Setup guide
Wake-on-LAN setup guide for PacketWake
Use this guide when you want your phone to wake a computer, server, or NAS on your home or office network.
The simple version
Wake-on-LAN is like ringing a special doorbell for a sleeping computer. PacketWake can ring the doorbell, but the computer and router must allow the doorbell to be heard.
Start with one nearby computer on the same Wi-Fi or LAN. Do not start with VPN, remote access, or complicated router rules.
What you need before you start
Look for Wake-on-LAN, network wake, PCI-E wake, or magic packet wake in the computer settings.
Your phone can be on Wi-Fi, but the sleeping computer usually wakes best when it is connected by Ethernet cable.
The MAC address is the hardware address of the network adapter that stays powered while the computer sleeps.
UDP port 9 is the normal first choice. Try port 7 later only if your network expects it.
1. Turn on Wake-on-LAN in BIOS or UEFI
Restart the target computer and open its firmware settings. This screen is often called BIOS or UEFI. Look for Wake-on-LAN, PCI-E wake, network wake, resume by LAN, or power on by PCI-E.
Enable the option, save the settings, and restart. If you do not see the option, check the computer or motherboard manual.
2. Turn on wake settings in Windows or macOS
On Windows, open the network adapter settings. Enable magic packet wake and allow the adapter to wake the computer. On macOS, check the power or battery settings for network wake options when the device supports them.
If there is a power-saving option that turns the network card fully off, Wake-on-LAN may fail after shutdown.
3. Find the right MAC address
Use the MAC address for the wired Ethernet adapter if the sleeping computer uses Ethernet. Do not use a Bluetooth, VPN, virtual, or disconnected Wi-Fi adapter.
A MAC address usually looks like `AA:BB:CC:DD:EE:FF`. PacketWake accepts common MAC formats and cleans them before sending the wake packet.
4. Create the PacketWake profile
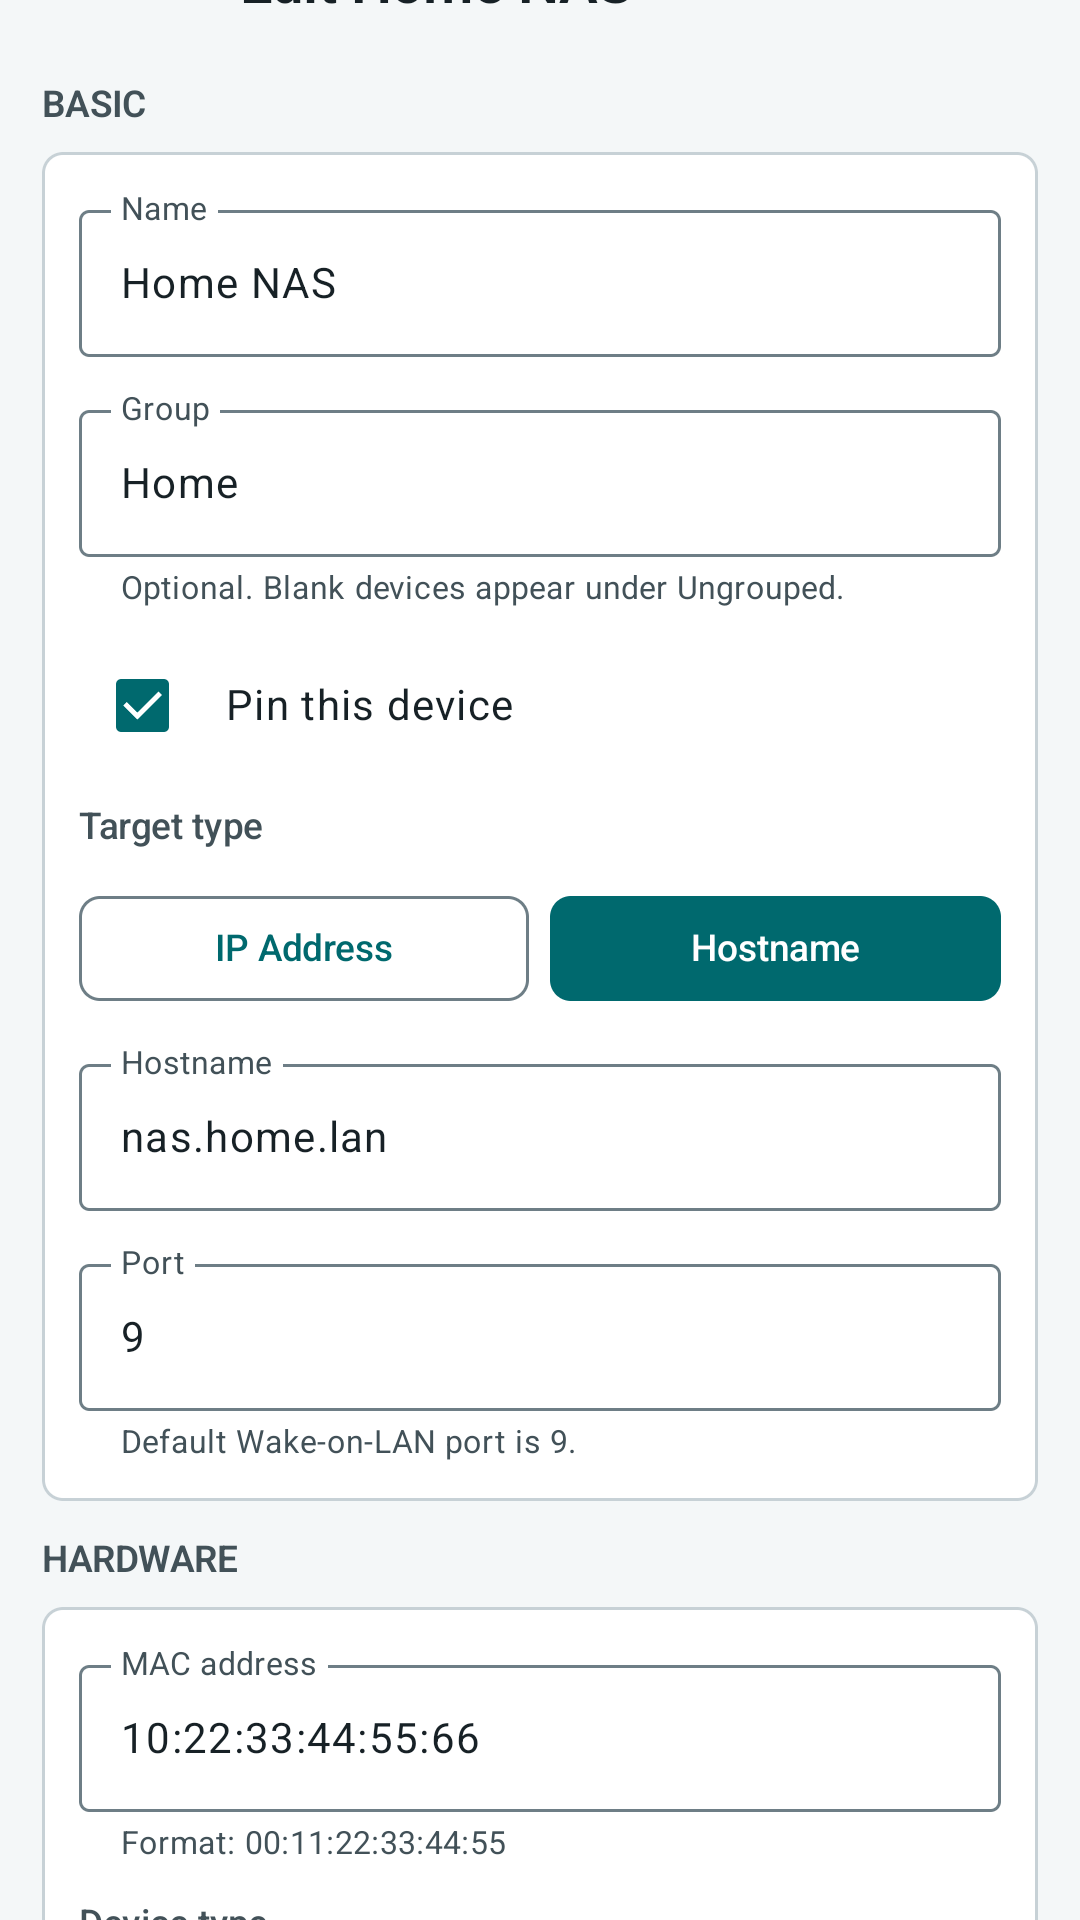
| Field | Plain meaning | Example |
|---|---|---|
| Name | The friendly name you want to see in the app. | Office PC |
| Target | Where PacketWake should send the wake packet. | 192.168.1.255 or office-pc.local |
| MAC address | The hardware address of the network adapter. | AA:BB:CC:DD:EE:FF |
| Port | The network door used for the packet. | 9 |
| Broadcast override | Optional. Sends to the whole subnet when direct sending does not work. | 192.168.1.255 |
| SecureOn | Optional. Only use it if the computer specifically requires it. | Leave blank for most devices |
5. Test on the same LAN first
Put your phone on the same normal Wi-Fi as the target computer. Avoid guest Wi-Fi for the first test because guest Wi-Fi often blocks local devices from talking to each other.
Put the computer to sleep, wait a few seconds, then tap Wake in PacketWake. If it works locally, you can later test VPN or router paths.
6. Use retries carefully
A retry means PacketWake sends the same wake packet a few more times. This can help if one packet gets missed, but it does not fix a wrong MAC address or blocked network. Keep retries small.
Use one computer, one phone, the same local network, port 9, and no SecureOn. Add advanced settings only after the simple setup works.